Cookie choices
None of these are needed to browse the site. Pick what you're comfortable with, and you can change it later from the footer.
Turn a logo or drawing into STL and 3MF sign models for a single-extruder printer. The 3MF includes M600 color-change points for PrusaSlicer.
 Open the full-size image
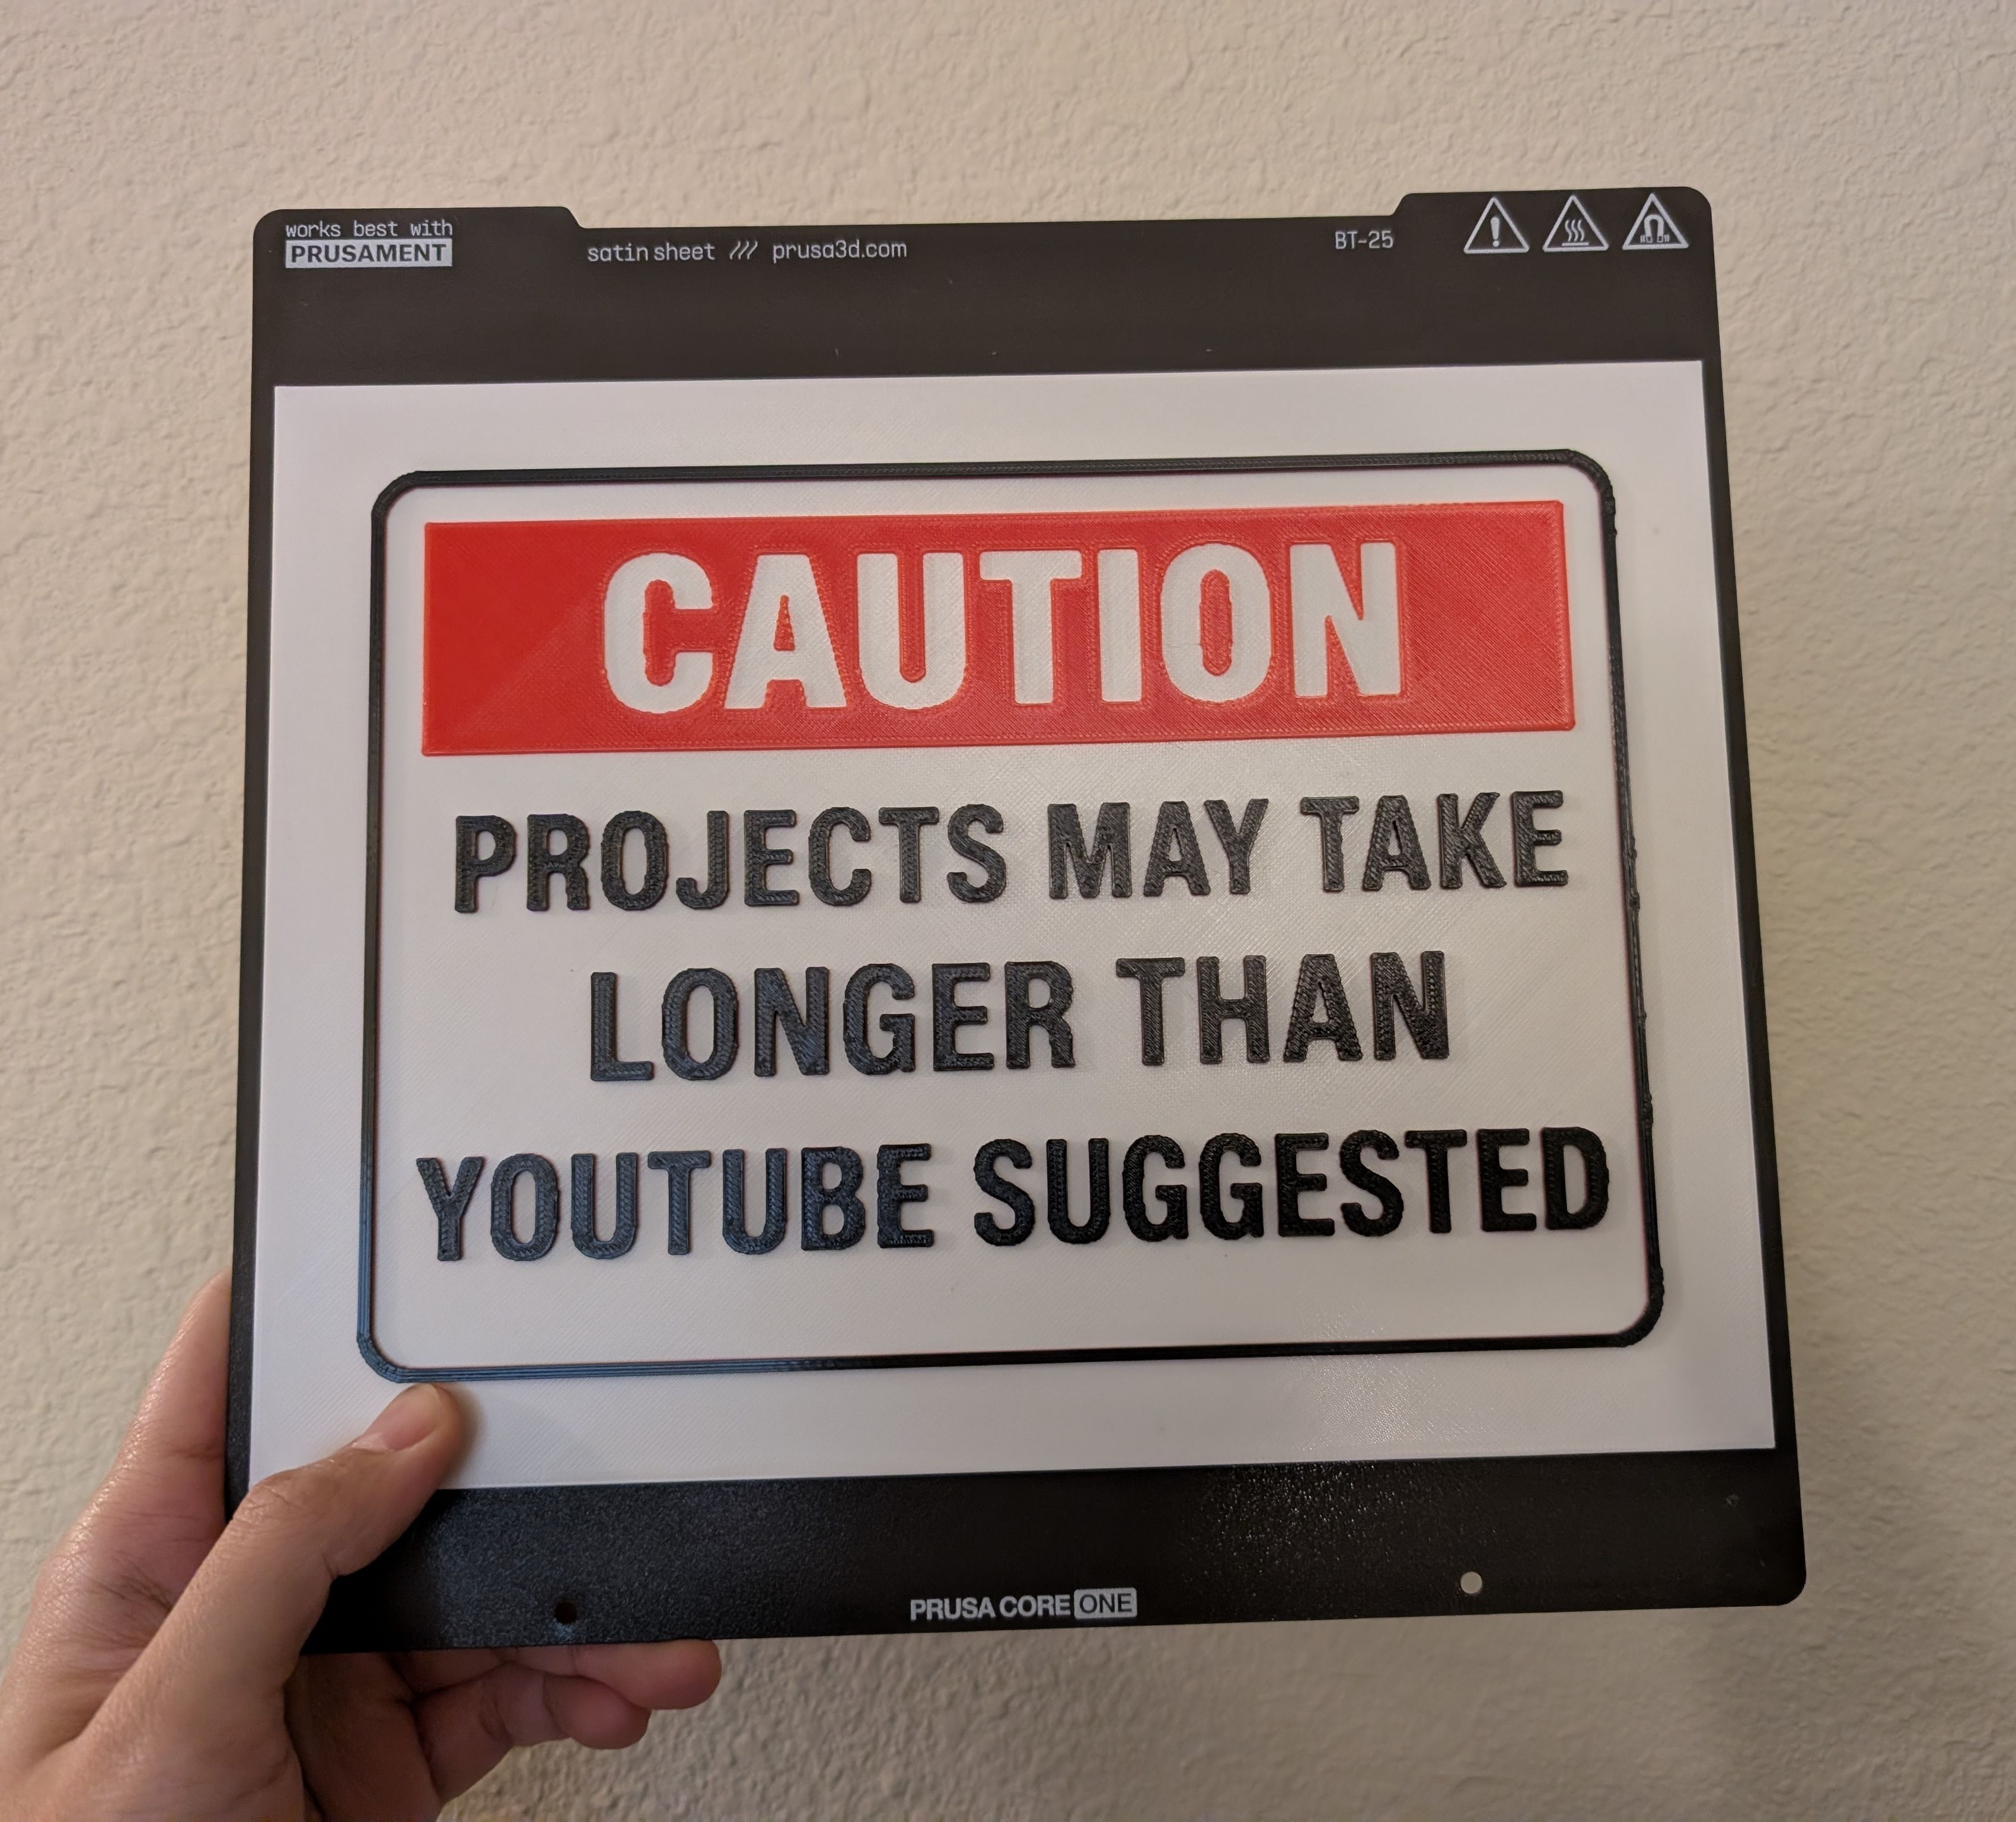
Did you know that your single-color 3D printer can print signs with multiple colors? Each color will print at a different height on top of each other, and the result can be a nice sign!
Start with a PNG or JPG. Logos and high-contrast drawings usually need fewer color decisions than a photograph, and lettering tends to work well too. Transparent pixels are filled with the background color you choose, so check that setting if your logo has no background of its own.
Small specks can turn into tiny islands of filament. The default smoothing and minimum color share clear most of them; pixel art may look better with both lowered to 0.
Open the free generator with the image you want to use, then set the finished size. Automatic layer order puts the color nearest your chosen background on the bottom and raises the darker parts above it. Choose Manual when you want an engraved background or need the filaments in a particular order.
Open the sign generator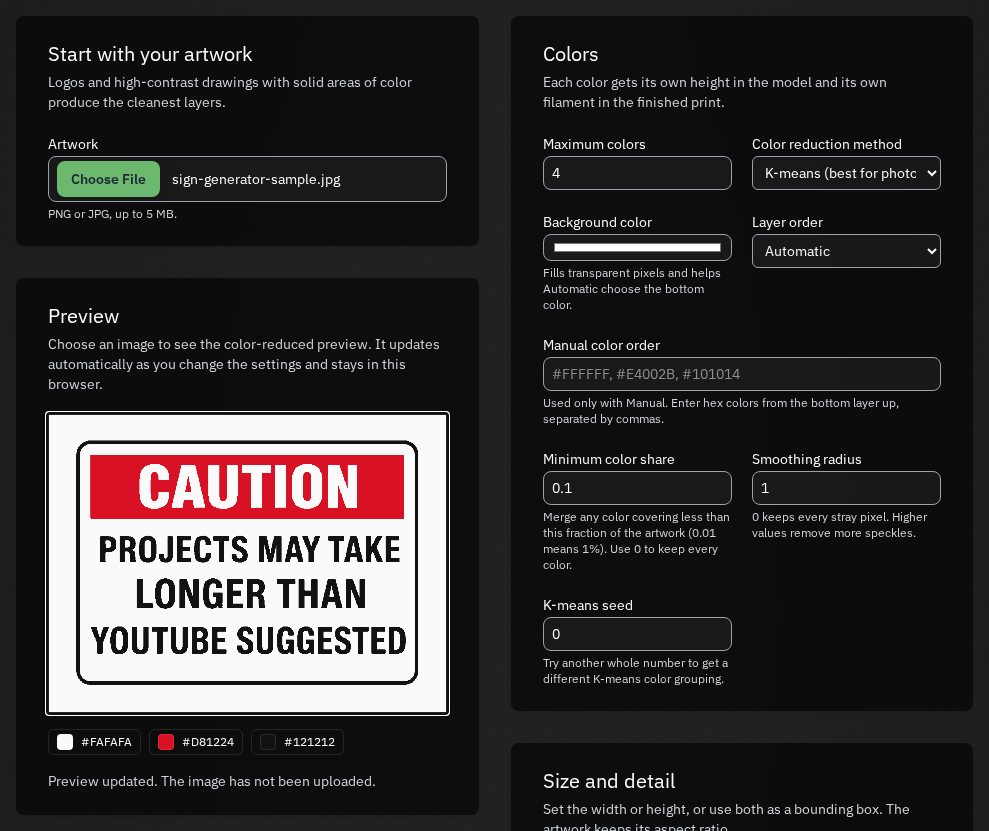 Open the full-size image
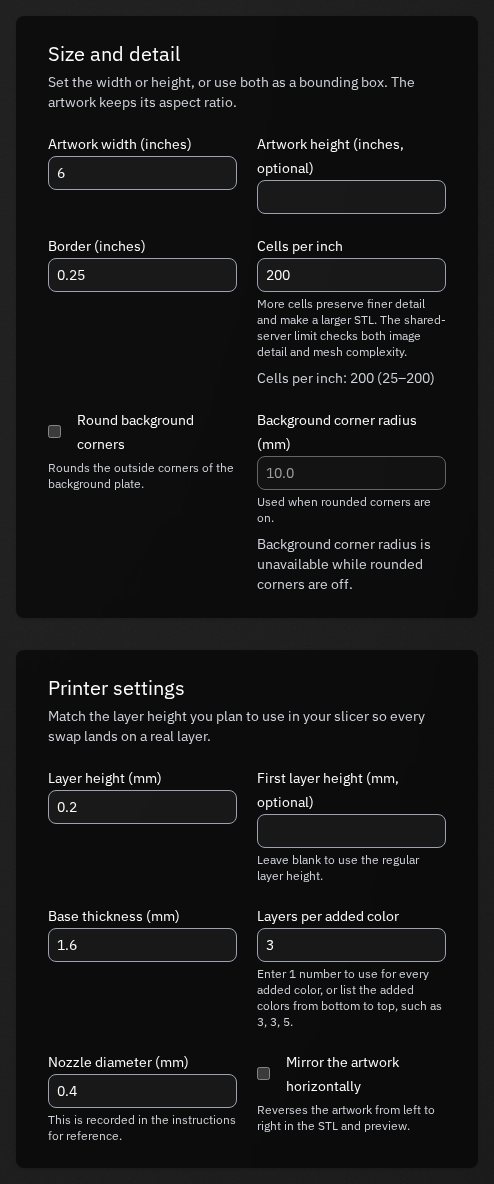
Turn on Round background corners when you want a softer outer shape, then set Background corner radius to control how far the corners curve inward. The automatic preview shows the outline before you generate the files.
The download is a zip with 4 files: a 3MF model with M600 color-change points for PrusaSlicer, the STL, a posterized preview, and a text file listing every filament change. The preview includes the color and layer legend when you select that option. ToolPool.Garden clears your uploaded image when the generation result is saved. You can download the zip again if a download fails, until it expires 1 hour after it's generated.
 Open the full-size image
Every swap height lands on a layer boundary. If the preview and the instructions seem to disagree with your slicer, check the regular and first-layer heights before changing the model.
The sign needs no supports. Use enough top solid layers for each filament to become opaque over the color below it; 3 layers at 0.2 mm is a useful starting point, while pale filament over a dark base may need more.
If your workflow needs a reversed model, mirror the artwork horizontally and check any lettering in the STL and layer previews before printing.
By the way, if you're into making stuff, ToolPool.Garden lets you crowdsource tools or other items you want to share with your community, anonymously. It's free up to 20 members or 250 tools. If you've enjoyed this tool, please check it out if you're interested, or send it to someone you think might be. Thanks!
This tutorial was last updated in September 2026. If it stops matching the generator, please let us know at [email protected] and we'll try to update things as soon as possible.
Reconnecting to ToolPool.Garden...